Users
Users will be the people within your company who will be actively using Followit to work on cases. To add them, you could either:
- Invite them by using their e-mail address.
- Synchronize your organization’s Azure AD (Active Directory).
In this section we will only discuss the first method (User Invitation). Click here to view the Sync Azure AD quick guide.
Invite New User
To invite new users to your Followit environment, you will need their e-mail address.
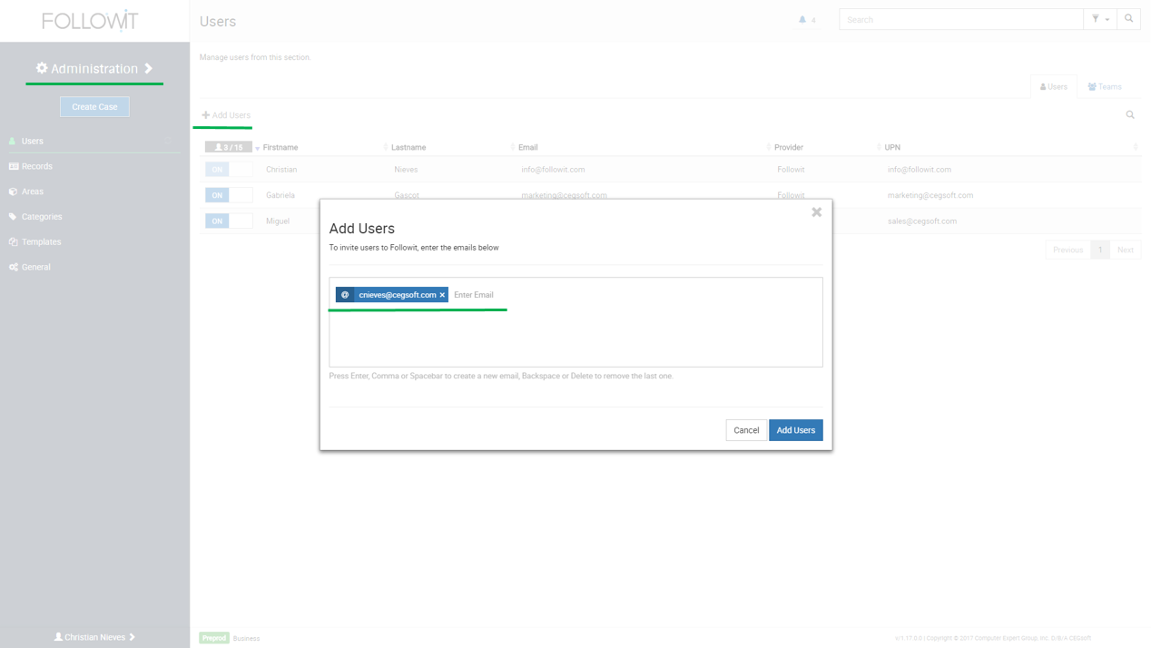
To send an invitation to a user:
- Navigate to Administration > Users.
- Click on the “Add Users” button.
- On the Add Users window, enter the email address of the user to invite.
- Press Enter, Comma or Spacebar to add another e-mail address, backspace or delete to remove the last one.
- Click “Add Users” to send the invitation.
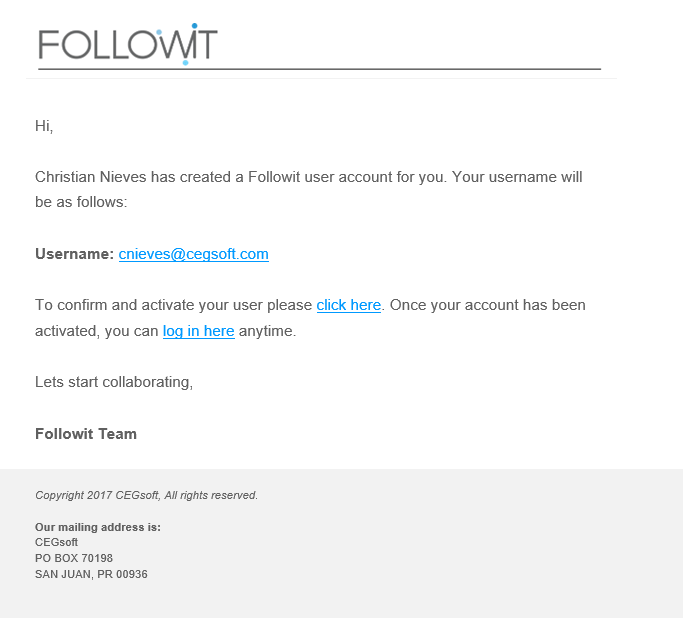
The user will receive an email notification with instructions on how to access Followit and will appear on the user list after the first login. You can edit their information from the list, but they cannot be deleted, only deactivated.
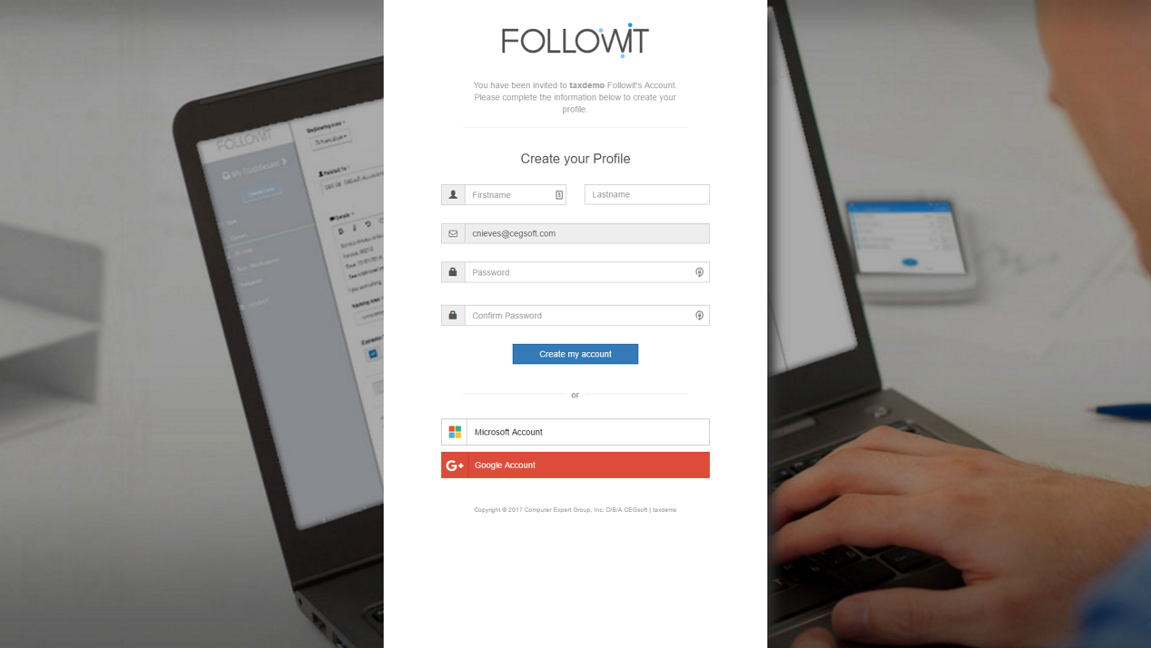
To accept a Followit environment invitation:
- Go to the user’s email account where the invitation was sent, and open the Followit User Invite email.
- Click on the “confirm and activiate your user” link.
4. Insert the required information like your name, last name, plus a valid password (at least 8 characters are required).
5. Once all the information is provided, click “Create my account”.
6. After completing these steps, the user will have created a unique Followit User Account that has access to the Followit environment.
User Profiles
Profiles are the roles that can be associated to the user. You can choose more than one profile. Below the options for each user:
- Agent: Can create and work new cases. Also, can update existing cases, among other privileges.
- Data Entry: Can create cases but cannot work on them or update existing cases, among other limitations.
- Monitor: Can generate reports and see all cases within the Areas assigned. Monitors can also manage the area’s configuration.
- Reports: Can see and generate various predefined dynamic reports case reports.
- KPI: Can see and generate Key Performance Index of users.
- Administrator: Can create, edit, and delete all items within the Administration section.
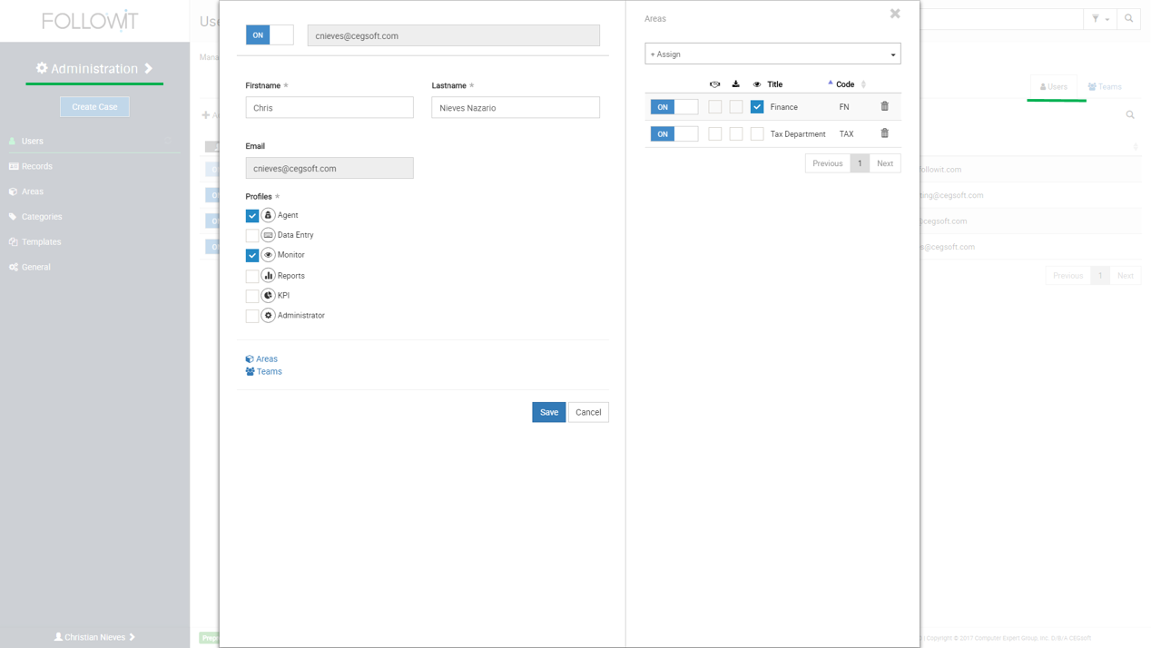
To edit a user’s profile:
- Navigate to Administration > Users.
- Select the user to edit from the list.
- On the User edit window, checkmark the profiles that you want to grant the user.
- Click Save to apply the changes.
Area Level Roles
There are two User roles that are specific to the Area assigned.
- Monitor: Can view the cases on the Area specified.
- Receiver: Will receive notifications of the cases referred to the Area.
- Associated Area: Can only receive delegated case from the area specified (does not belong to the area specified).
Monitor Role Note: If you turn the Monitor role on for a user, you need to choose what areas they’ll be monitoring. For them to be able to see cases in other user’s inboxes, meaning monitor areas, you must checkmark the Areas you want them to monitor on the right corner below the monitor icon.
Associated Area Note: If you assign a user as Associated to an area, that user will only be able to receive delegated cases from the specified area. This role is to be used when working with areas such as Human Resources or any other area where cases might need insight or interactions from users that do not work within that particular area.
Want to watch the Video Tutorial? Click Here